Showing posts with label Patriotic. Show all posts

Tuesday, June 24, 2014

Feeling Patriotic - The Americana Collection

It's collection time again!! This time I take inspiration from the upcoming 4th of July and the national anthem, The Star Spangled Banner, to bring you the ultimate Americana Collection. :)

Available on:


This collection has a little of everything. 2 glitter toppers, 2 shimmered holographics in red and blue, and a creamy white crelly with red and blue glitter.


And did I mention how amazing they look together? I used all 5 to create this amazing mismatched mani - perfect for any patriotic holiday. It is seriously easy too! This is 2 thin coats of Star Spangled on my middle fingers, 3 thin coats of Rockets Red Glare and Twilight's Last Gleaming with one thin coat of Home of the Brave and Bombs Bursting in Air over each respectively.

Stick around to get a look at each polish. :)


Twilight's Last Gleaming is a blue holographic with a chunky blue shimmer. It dries to a matte like finish so a top coat is a must to really bring life back.


Bombs Bursting in Air is one of those very simple polishes that manages to be something amazing! It's a mix of red, white, and blue stars and bar glitter with a dose of rainbow colored shimmer. I am reminded of fireworks exploding in a night sky every time I look at this. Shown here over Carbon Copy from The Neutrals creme collection.


And here is a close-up of how it looks over Twilight's Last Gleaming. That shimmer is just to die for!!


Star Spangled is a creamy white crelly with red and blue hexes and stars that is just sheer enough to showcase every piece of glitter. Shown here is 2 thin coats. The key is keeping your layers thin so you show glimpses of the previous layers glitter. :)


This may look familiar to those of you who have been with me from the start. This is the reformulated Miss 'Merica that was tucked into orders around the 4th of July last year. Now going by Home of the Brave, this polish is a perfect fit for the Americana Collection. It's a mix of red, white, and blue glitter with blue stars. It adds a patriotic touch to any polish. Shown over Hearthstone from The Darks creme collection.


Last but no where near least is Rockets Red Glare. This one is so hard to photograph, and I really didn't manage to capture the true awesomeness of this polish. It is a red holographic with a fine red shimmer. I direct your attention to the mismatched mani at the top of this post as it really shows a lot more of its shimmer and shine in that pic. This polish also dries to a matte like finish so a top coat will really help add shine and sparkle. :)

If you stuck around through the whole post - congrats and I hope you enjoyed the Americana Collection. Do you have a favorite from this collection?

And here's a bit of real life news if you stuck around. One of my nieces just turned 16 yesterday. Where does the time go?? For the first few years of this little girl's life I helped raise her ... so I'm really feeling old. 


Until next time,
♥ Ashley

Wednesday, July 3, 2013

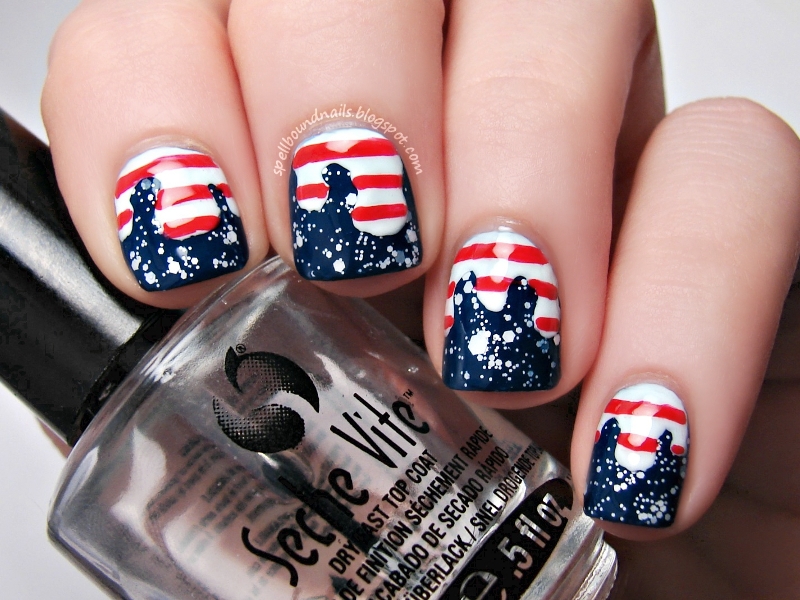
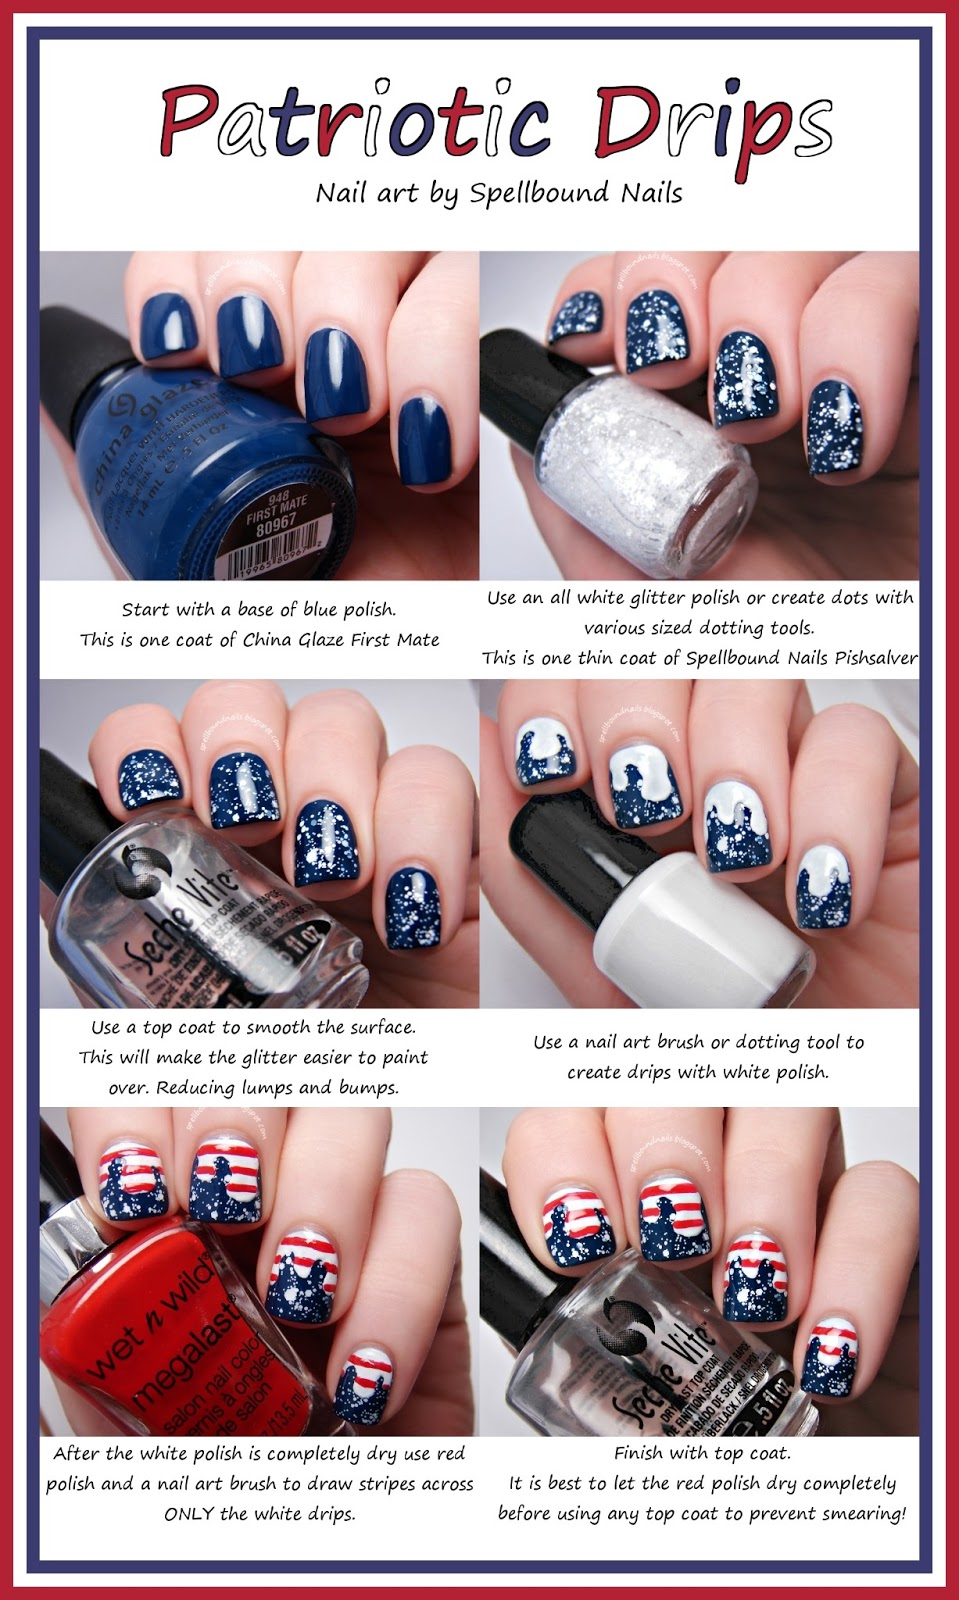
Patriotic Drips Nail Art Tutorial

Hello everyone!! It's been forever since I posted anything. I knew running a nail polish business was going to take time, but I guess I never realized just how much of my blogging time it would eat into. I'm working really hard to keep up with orders, restocks, and developing new releases. Any free time I manage to grasp is spent storing up nail art and swatches so I can start posting again - hopefully within the next few months.

nail art Spellbound Nails Patriotic 4th of July red white blue stripes stars glitter America Independence Day

My patriotic nail art has been getting a ton of stardom lately. My nails can even be found in the July issue of People StyleWatch magazine! If you don't have a subscription to this magazine I recommend getting one. It's one of the best magazines I've read in a long time! I didn't have to search and skim, skipping large portions of the magazine, because every page had something interesting to me.

Spellbound Nails People Style Watch StyleWatch patriotic 4th of July Independence Day red white blue

Now, onto the nails!!! With all that interest for my patriotic nails I decided to try something different. I won't claim that I created this - someone, somewhere has probably done this before - but I will say it is something I have never seen before! I would love to see your nails if you decide to try the tutorial, so don't be scared to send them to me. I don't bite. Promise!! :)

Right click and open in a new tab if you're having trouble reading the tutorial.

Patriotic Drips nail art Tutorial Spellbound Nails red white blue stripes glitter America Independence Day 4th of July

That's it for now. For those who don't follow me on Facebook but enjoy my polish I will be having a big restock, complete with a ton of NEW polishes and the return of those sold out polishes some of you may be waiting for! Head over to my Etsy shop tomorrow to see what I've come up with. Hope to see ya there. :)

Monday, November 12, 2012

Veterans Day Tutorial

Here in the Untied States we have Veterans Day, a holiday to honor our armed service veterans. For other countries, there is Armistice Day or Remembrance Day. With the exception of Italy who celebrates on the 4th, these holidays are celebrated on November 11th. Here is my attempt to honor US veterans, the only way that truly comes from the heart, with nail art. It's a photo tutorial too!!

nails nailart nail art polish mani manicure Spellbound patriotic United States US USA American Flag Veterans Day stripes red white blue stars holo holographic Wet n Wild I Red a Good Book Fergie Hollywood Walk of Fame China Glaze First Mate tutorial

I used Wet n Wild - I Red a Good Book and L.A. Colors - White for the stripes. The blue is China Glaze First Mate and the stars and holo glitter were painstakingly dug out of Wet n Wild Fergie - Hollywood Walk of Fame.

I've been asked many time how I get such perfect stripes. I wouldn't exactly call them perfect, but I'll take a moment to explain. As you can see in the second step, I use tape. I don't use any special kinds of striping tape or anything, just regular scotch tape. I put a piece of tape on some wax paper and cut notches along the length, as evenly spaced as I can get. Once I have notches across I use them as a guide and cut the whole way up the tape. After that, it's simple to peel the tape off and create stripes with it along my nail. Make sure your nails are completely dry before you put tape on them. Press lightly along the edges and make sure you get the tape into the edges of your nails. If the tape has any bubbles near the edges or there are any raised parts polish will seep under and it might ruin your stripes. Paint over them and immediately—carefully—remove the tape.

Cut the tape larger or smaller for larger or smaller stripes. I've used this method to create stripes side to side, up and down, and sunbeams too so be creative. And, if this isn't enough to make you happy, just think of all the money you're saving by not having to buy striping tape!