Hello everyone! After jealously eyeing all the subscription boxes other bloggers have been posting about recently, I was so excited to be asked to share Wantable and the September Wantable Box with you!!
Showing posts with label Revlon. Show all posts
Monday, September 16, 2013
September Wantable Box - Image Heavy
*All products were sent to me for testing and review, completely complimentary, from Wantable. All thoughts and opinions are my own.
Labels:
Be A Bombshell,
Dickinson's,
L'Oreal,
Laqa & Co,
Lise Waltier,
Makeup,
Manna Kadar,
Mary Kay,
Michael Marcus,
Neutrogena,
Product Review,
Revlon,
Subscription Box,
Wantable
Monday, April 29, 2013
Disney Challenge: Tangled
Hey everyone! Sorry for dropping off the face of the Earth. My slight cold turned into a full blown cold and has me still sniffling, sneezing, and coughing. In an effort not to fall behind in the Disney Challenge, I've decided to skip The Lion King and simply come back to it at the end of this challenge. I've also decided to keep today's mani for Tangled very simple.
For those of you who haven't seen the movie, this is the scene I attempted to recreate. :)
Up next in the Disney Challenge: 101 Dalmatians! I already have this one sketched up. :)
Up next on the blog is another mani for the Time Periods Challenge. This one Imperial China. I'm stumped on this one. :(
Goodbye April. Hello May!
Like I said, I kept today's nails very simple. One of my favorite parts of the Tangled movie was when Rapunzel finally saw the lanterns in person. The absolute awe and amazement on her face is priceless. So I tried to recreate what she saw. I used Revlon Enchanted, Rimmel I Lilac You, Petites Color Fever Periwinkle and China Glaze First Mate for the night sky background. Then I used a very small piece of sponge to dab on some of the flakies from Essie Shine of the Times. I think these flakies create the perfect lanterns!!
Up next in the Disney Challenge: 101 Dalmatians! I already have this one sketched up. :)
Up next on the blog is another mani for the Time Periods Challenge. This one Imperial China. I'm stumped on this one. :(
Goodbye April. Hello May!
Wednesday, April 10, 2013
Time Periods Challenge: Ancient Greece
Ever feel like there is so much to do and not enough time to do it? I feel like that a lot lately. It's the reason for all the late night posts. I just can't seem to get ahead, but I am really grateful not to be behind! I would feel 100 times worse if I was behind. So, today's post is another Time Periods Challenge mani. We're on Ancient Greece now.
I decided on a Greek wave mosaic. Like the Greek fret, the ocean-like wave pattern was very common. Another common feature in Ancient Greek art was the pebble mosaics. It was something the Greeks pretty much perfected.
I used a base of Revlon Waterfall and then created the waves with Sephora by OPI Read My Palm. Once the waves were completed I started layering blue/green sequins over them, using clear polish to attach them when my base color dried. This is a design that will take a while as each sequin has to be added one at a time so that they touch or even overlap a little.
With thing heating up around here there are a few things I forgot.
Things I forgot over winter:
I decided on a Greek wave mosaic. Like the Greek fret, the ocean-like wave pattern was very common. Another common feature in Ancient Greek art was the pebble mosaics. It was something the Greeks pretty much perfected.
I used a base of Revlon Waterfall and then created the waves with Sephora by OPI Read My Palm. Once the waves were completed I started layering blue/green sequins over them, using clear polish to attach them when my base color dried. This is a design that will take a while as each sequin has to be added one at a time so that they touch or even overlap a little.
With thing heating up around here there are a few things I forgot.
Things I forgot over winter:
- The heat causes my polish to bubble as it dries
- The heat slows dry time, meaning I can't get away with rushing to add a second coat.
- A fan too close while I'm doing my nails causes the polish to dry out quickly on the brush turning it thick and tacky.
- The heat sometimes causes my fingers to swell, which means I'm not as dexterous as I need to be for both painting my nails and for taking pictures ... especially for taking pictures.
Monday, March 11, 2013
Pastel Gradient with Born Pretty Store Studs
Hello again! Gradients seem to be the thing for me lately. I think it's the coming of Spring and Summer; I'm just preparing! So I dug out the most pastel colors I own for a pretty and feminine spring gradient — a little early, but it would be perfect for Easter.
Those most pastel colors I own just happened to be Sally Hansen Pink Blink, Petites Color Fever Creme Blue, and Revlon Enchanting. I decided to try a makeup sponge with this gradient instead of my usual eyeshadow applicator. I like the smooth fade between colors, but I didn't like the extra work it took to get the colors built up. I also thought it was beyond time to break out my Born Pretty Store gold metal studs. I received these by mistake with an old order and they were nice enough to let me keep them while also shipping out the ones I did order. It's been too long since I played with these studs. ;)
I'm thinking it's also been too long since I ordered anything from the Born Pretty Store. I forgot how awesome their nail decorations are! And they've come out with so much more since my last order. I'm dying for the hearts ... and the squares ... and the stars ... and ... well, I think you get the idea! I'll definitely be ordering something.
Monday, February 11, 2013
Feeling Girly With Revlon
In my continuing attempt to be unique this Valentine's Day I decided to dig out my recent Revlon purchase. I've used the new Revlon Enchanting a few times, but I never got around to using their new glitter I was so excited about. So here is a shot of Girly over Enchanting.
I'm really fond of this combo. Girly is a light purple/pink sheer base with purple, light pink, and fuchsia glitter. There are also some small holographic pink and purple glitter tossed into the mix. Overall, it really does make for a soft and girly mani.
What wasn't girly was my hair yesterday. Some of you will remember my adoration of The Freckled Fox's Posh Faux Hawk in my Blogs to Love Friday #1 post. Well, I went and did it! I am nowhere near an expert at doing my hair. Usually it's either straight and down, up in a ponytail, or curled in the off chance I'm not feeling lazy. Like I said, I'm no expert. Far from it. But I don't think I did too bad for my first try. I dressed in the cute striped top you see with some black skinny jeans and gray heeled cowboy boots; I love how this new hairstyle added some edge to the outfit. I will definitely be trying this again.
I also took a picture once I took my hair down. I felt like a true child of the 80s. :)
Here's hoping Valentine's Day comes soon because I am running out of unique V-Day mani ideas. You should want Valentine's Day to be over too because I have some really awesome St. Patrick's Day polishes that will be for sale in my Etsy Shop next week. I will be posting swatches after V-Day. If you can't wait, you can get a preview (and help name one of them) on my Facebook Page.
I'm really fond of this combo. Girly is a light purple/pink sheer base with purple, light pink, and fuchsia glitter. There are also some small holographic pink and purple glitter tossed into the mix. Overall, it really does make for a soft and girly mani.
What wasn't girly was my hair yesterday. Some of you will remember my adoration of The Freckled Fox's Posh Faux Hawk in my Blogs to Love Friday #1 post. Well, I went and did it! I am nowhere near an expert at doing my hair. Usually it's either straight and down, up in a ponytail, or curled in the off chance I'm not feeling lazy. Like I said, I'm no expert. Far from it. But I don't think I did too bad for my first try. I dressed in the cute striped top you see with some black skinny jeans and gray heeled cowboy boots; I love how this new hairstyle added some edge to the outfit. I will definitely be trying this again.
I also took a picture once I took my hair down. I felt like a true child of the 80s. :)
Tuesday, February 5, 2013
I Give You My Hearts
Continuing with the Valentine's Day theme, the mani I bring you today is another of my attempts to use colors other than the standard red, white, and pink ... though I do seem to be using a lot of pink with my recent manis. :)
When I first started with Sally Hansen Pink Blink and Revlon Enchanting, I was told this looked like an Easter mani. I lost some of my confidence at that, but I rallied and finished this mani as I had planned: with a line of hearts down the middle of each nail using the opposite color. Personally, I think it turned out really well for trying something slightly nontraditional!
If you're not comfortable using colors other than red, white and pink for Valentine's Day, this mani will work just as great with any combination of those colors! You could even use them all if you want, using pink and red on opposite nails and finishing with white hearts or use pink and white on your nails with red hearts. Maybe even spice it up with your own color combo! Be traditional or be daring, but whatever you choose: have fun!
A bit of real life news: I entered my adorable pup, Shiloh, in the World Spay Day 2013 Pet Pageant. The pageant runs until March 15th, and you can vote once per day in each category. I would love it if you would give Shiloh's entry a look and give her a vote if you think she deserves one. It will ask you to login or create an account to vote. If you click 'create an account to vote' you can then select to vote with Facebook. Thanks!!
When I first started with Sally Hansen Pink Blink and Revlon Enchanting, I was told this looked like an Easter mani. I lost some of my confidence at that, but I rallied and finished this mani as I had planned: with a line of hearts down the middle of each nail using the opposite color. Personally, I think it turned out really well for trying something slightly nontraditional!
If you're not comfortable using colors other than red, white and pink for Valentine's Day, this mani will work just as great with any combination of those colors! You could even use them all if you want, using pink and red on opposite nails and finishing with white hearts or use pink and white on your nails with red hearts. Maybe even spice it up with your own color combo! Be traditional or be daring, but whatever you choose: have fun!
A bit of real life news: I entered my adorable pup, Shiloh, in the World Spay Day 2013 Pet Pageant. The pageant runs until March 15th, and you can vote once per day in each category. I would love it if you would give Shiloh's entry a look and give her a vote if you think she deserves one. It will ask you to login or create an account to vote. If you click 'create an account to vote' you can then select to vote with Facebook. Thanks!!
Saturday, January 26, 2013
Candy Coated Collection — Lollipop Princess
The only polish from this collection inspired by a character and not a location. Lollipop Princess was inspired by Princess Lolly, resident of the Lollipop Woods and princess of Candyland.
Update: This polish and the rest of the collection are now up for sale in my Etsy shop.
Lollipop Princess has pink, purple, and yellow hex glitters. And, since every princess needs some bling, small purple holo glitters.
Lollipop Princess over Wet n Wild I Need A Refresh-Mint.
In an effort to really showcase the holographic glitter I layered one coat of Lollipop Princess over Revlon Enchanting with a black accent nail. I think I caught the holo at just the right angle and light to make it flare. Mostly I caught the bright blue flares but it also turns a white/purple and a bright pink. You can see one small flash of pink on my pinky nail.
I have been dying to see this glitter matte since I first mixed it up so I decided to add a layer of NYC Matte Me Crazy. Wow! I don't ever want to take this off!!!
Update: This polish and the rest of the collection are now up for sale in my Etsy shop.
Lollipop Princess has pink, purple, and yellow hex glitters. And, since every princess needs some bling, small purple holo glitters.
I'm going to have to try to get some better pictures. The colors are slightly off in this close-up and in the bottle picture.
Lollipop Princess over Wet n Wild I Need A Refresh-Mint.
In an effort to really showcase the holographic glitter I layered one coat of Lollipop Princess over Revlon Enchanting with a black accent nail. I think I caught the holo at just the right angle and light to make it flare. Mostly I caught the bright blue flares but it also turns a white/purple and a bright pink. You can see one small flash of pink on my pinky nail.
I have been dying to see this glitter matte since I first mixed it up so I decided to add a layer of NYC Matte Me Crazy. Wow! I don't ever want to take this off!!!
Wednesday, January 23, 2013
S is for ...
I was really inspired this weekend; I've really missed doing nail art! This is actually a design I sketched up and then realized that it worked perfectly for S in the ABC Challenge.
S is for ... Spring Scene.
You should be expecting this by now, but I used my eyeshadow applicators and Revlon Garden and Sinful Colors Exotic Green to create a leafy texture as a base. The white picket fence came next, hand drawn with a nail art brush, and the flowers were started with a dotting tool and finished with a nail art brush.
With recent temperatures reaching into the single digits, I'm really longing for some flowers!
Be on the lookout tonight for another ABC Challenge mani as I finally get caught up. :)
S is for ... Spring Scene.
You should be expecting this by now, but I used my eyeshadow applicators and Revlon Garden and Sinful Colors Exotic Green to create a leafy texture as a base. The white picket fence came next, hand drawn with a nail art brush, and the flowers were started with a dotting tool and finished with a nail art brush.
With recent temperatures reaching into the single digits, I'm really longing for some flowers!
Be on the lookout tonight for another ABC Challenge mani as I finally get caught up. :)
Monday, January 21, 2013
Rite Aid Haul
I was very lucky to visit Rite Aid yesterday as I was told they were switching out their stock, trading old polishes for new ones. The old stock took a huge drop in price and were placed in a clearance bin! I seriously cannot resist a sale, and I grabbed nearly every polish I could get my hands on.
Here are all the clearance polishes.
First up are the polishes I paid full price for. In the center is Sally Hansen Breezy Blue and Pink Blink. On the ends are Revlon Girly and Enchanting.
Girly and Enchanting are new shades from Revlon. I vow to buy more of these new shades because they are so, so pretty. I chose Girly first because I'm a sucker for glitter, especially glitter suspended in a pinky purple-ish base. Being a fairly sheer base though I knew this glitter would need some undies. That's why I picked up Enchanting and Pink Blink. I think Girly will look gorgeous over both!!
Seriously, look at that glitter!! How can you possibly resist??
The first things I found in the clearance bin were $0.74 Color Fever petites in their rounded bottles. I had color fever and picked out all of these! Peach Blush, Periwinkle, Creme Blue, and Vintage Gray.
I also picked out the three square bottles of Color Fever. These ones in Potion, Seashell, and Raspberry Ice. I'm loving Raspberry Ice in the bottle, but am unsure just how great it will look on my nails.
I found two CQ next. I removed the original $3.99 price tags since they covered the front of the bottle. Silver Taupe looks a good deal lighter in person and seems to be an actual shade of taupe when not placed next to such a light color as Pearls.
Last but not least are these three Scherer Chameleon polishes in Tiny Dancer, Fandango, and Mist. They are all so very, very pretty!!
What do you think of my haul? I think I'm going to need a bin for all my untried polishes soon. The list just keeps getting longer.
Here is my complete haul. On top of the sale polishes I grabbed four others.
First up are the polishes I paid full price for. In the center is Sally Hansen Breezy Blue and Pink Blink. On the ends are Revlon Girly and Enchanting.
Girly and Enchanting are new shades from Revlon. I vow to buy more of these new shades because they are so, so pretty. I chose Girly first because I'm a sucker for glitter, especially glitter suspended in a pinky purple-ish base. Being a fairly sheer base though I knew this glitter would need some undies. That's why I picked up Enchanting and Pink Blink. I think Girly will look gorgeous over both!!
Seriously, look at that glitter!! How can you possibly resist??
The first things I found in the clearance bin were $0.74 Color Fever petites in their rounded bottles. I had color fever and picked out all of these! Peach Blush, Periwinkle, Creme Blue, and Vintage Gray.
I also picked out the three square bottles of Color Fever. These ones in Potion, Seashell, and Raspberry Ice. I'm loving Raspberry Ice in the bottle, but am unsure just how great it will look on my nails.
I found two CQ next. I removed the original $3.99 price tags since they covered the front of the bottle. Silver Taupe looks a good deal lighter in person and seems to be an actual shade of taupe when not placed next to such a light color as Pearls.
Last but not least are these three Scherer Chameleon polishes in Tiny Dancer, Fandango, and Mist. They are all so very, very pretty!!
What do you think of my haul? I think I'm going to need a bin for all my untried polishes soon. The list just keeps getting longer.
Thursday, January 3, 2013
Q is for ...
I am a sick, sick woman and, in a totally different way, so is the little guy on my nails today. What could I do for Q in the ABC Challenge? Queen, quilt, or maybe even quiz? Of course not! You know me, I have to think outside the box with this challenge. Brace yourself!
Q is for ... queasy. And I'm getting a little queasy just looking at them.
Yes, that is what it looks like ... 'sick up' splatter using Revlon Garden over Sally Hansen Mellow Yellow.
Are you feeling a little queasy now too?
Q is for ... queasy. And I'm getting a little queasy just looking at them.
Yes, that is what it looks like ... 'sick up' splatter using Revlon Garden over Sally Hansen Mellow Yellow.
Are you feeling a little queasy now too?
Tuesday, November 13, 2012
Facets of Fuchsia
Today's polish was part of my birthday haul. I'm sure you all know by now how much I love purple on my nails ... and glitter, so this is really a perfect polish for me.
This is Revlon Facets of Fuchsia. I found this polish extremely hard to photograph. The glitter definitely turned more purple in this picture than the extra bright true fuchsia that can be seen in person. Facets of Fuchsia has a black jelly base with beautiful large and small fuchsia hex glitters. This is three coats of polish. The first coat went on very, very sheer, but it builds up quite nicely. I tend to use thicker coats and could have gotten away with two coats. I simply did the third in hopes of getting more of the larger glitters. Sadly, most of the large glitter refused to budge from the sides of the bottle and those that did wanted to stick to my brush more than my nail, but given more time and patience I'm sure I could have gotten more on my nails. I didn't have any problems with the glitter sticking up too far, but like most glitter polishes it did have a texture. A top coat smoothed everything out nicely though.
Some of you may be thinking this polish looks familiar. And it should! Revlon is the reigning Queen of the Dupes. Facets of Fuchsia is a near exact match for Deborah Lippmann's Bad Romance. I don't own Bad Romance, so I can't give you a comparison post myself. However, I did find a really great comparison post done by Fab Fatale. Find the post here: Bad Romance vs. Facets of Fuchsia and make the decision for yourself. Is Facets of Fuchsia enough dupe for you?
::Thank you, Vee of Masquerade Nails, for sending me on a search that let me know Revlon made Facets of Fuchsia (part of a limited edition collection) a permanent part of their polish line. They simply renamed it Scandalous.::
Saturday, June 30, 2012
Birds of a Feather
I am very excited about this post. It's feather nails! I've been wanting to try these for months. I picked up the feathers a day or two before my last nail break though so doing these nails was put on hold. My nail has since grown back nicely so I figured it was past time to try feather nails for the first time.
Before attempting these nails I scoured the internet for blogger tutorials and youtube videos. What I learned is that while everyone has their own quirks, it's all basically done the same way. With this in mind, I set out to complete my own nails keeping the feather tutorials in mind.
I started with two coats of Revlon's Bare Bones. I thought of buying brightly colored feathers or using a bright polish but I wanted these nails to be slightly more classic. I wanted them to look more realistic for my first try. So I went for the realistic feathers and a neutral base color.
What I quickly realized is that the nails were very easy to do. Time consuming, yes but hard, not so much! I would recommend buying the bagged loose feathers. The only realistic feathers my craft store had though was a feather pad . I have no idea what this is used for originally but whatever it's meant for ... I don't think the feathers are meant to be just plucked and pulled off like I was doing. Some of them wouldn't come off at all and those that did left pieces behind. Still, I got more than enough of the feather to work with, so I guess the feather pad worked well enough.
Putting the feathers on was also a fairly simple task. I used the glue-like polish that comes in gem packages. I figured if it can hold on my gems for days it should be no problem to hold on a feather.
The first thing to remember when putting feathers on your nails is that you don't want to trim them too much before you have them practically glued to your nails. They will fall apart! Get them laid on your nails over a layer of clear polish, nothing quick drying because you need time to work, and then trim them around your nail. You'll want a small pair of scissors to do the trimming. I found it easier to trim because mine were both small and sharp tipped. After you get them trimmed around your nail you'll likely find you have some small, sharp pieces hanging over your nail. I recommend turning your scissors at an angle to lay over your nail and trimming the tips this way. Get the bottom blade under the pieces of feather hanging over your nail and use the top blade (still at an angle) to skim the very tip of your nail. Be very careful you don't cut your finger or your nail, just the feather! Anything you can't get with a pair of scissors can be lightly filed with a soft file.
I used three or four coats of a thick, quick dry top coat over the feathers. It took about that many before the polish stopped settling around the feather and the nail got smooth.
Here is the last picture I have to share. It's a natural part of the feather I used on this finger. I didn't even realized one of the spots formed into a heart, but I was ecstatic to see this!! It was like a little bit of love from the feathers themselves.
These feathers stayed on my nails for 5 days, and they only came off because I removed them! This is a very lasting manicure. This might have something to do with the feathers adding some protection to the tips of your nails or simply because you use so much top coat to seal them. Whatever it is, this mani lasts and looks amazing! The reactions you get when you say they're real feathers is also pretty darn cool.
Tuesday, June 5, 2012
Golden Twilight
Today's post puts Maybelline New York's new Color Show nail polish in the spotlight. Color Show is part of Maybelline's collection of runway colors. The Color Show collection comes in, get this, 40 new shades!! 30 hot colors and 10 statement pieces. The hot colors are mostly bright, bold neons and deep shimmer filled polishes while the statement pieces encompass crackle like polishes they call shredded, denims, and metallics. These polishes are priced to sell as well. I picked these two up for about $2.97 a bottle. I read somewhere that the top price is likely to be $3.99, but check your local shops to be sure. With the price and multitude of shades you can always have nails like a supermodel.
I felt myself very lucky to find these polishes in stores already. My town is usually the last to receive new products. With this in mind I immediately grabbed Twilight Rays and Bold Gold. Twilight Rays is a black polish filled with a gold glittery shimmer. I found the gold glitters nearly disappeared into the black with three coats of polish. Even in sunlight they didn't really pop like I thought they would. Nice to be sure, but not what I was expecting.
Bold Gold is a shade I have been looking for for what seems like forever. I've tried handfuls of gold polishes looking for this exact shade and texture. I'm ecstatic to finally own this color after so long. Bold Gold is a gorgeous yellow gold metallic. It has a very fine shimmer effect to it that doesn't overpower the delicate color like some other polishes. This is a perfect gold in my opinion! While Twilight Rays left me slightly disappointed, Bold Gold really stepped up.
I will say I had some major trouble getting Bold Gold to stay on my nails while painting them. The brush kept swiping the polish right off. The polish itself looked to be separating, oddly enough. When it was swiped off it left behind a watery oil with no color. I had to start over after my first attempt. I have reason to believe the polish was reacting to my base coat since I used a different base coat on my second attempt and things went smoother. There were still a few problems but no separation. A second coat of Bold Gold took care of that.
That said, Bold Gold stayed on my nails for about a week. I'm sure it would have lasted longer if I hadn't removed it myself. It had absolutely no chips and not even any wear on the tips when I took it off last night. Amazing!
Here is a close up of Twilight Rays. You can see the shimmer is actually a combination of tiny flecks of micro glitters and larger, yet still very small, hexagonal glitters.
And here is a close up of Bold Gold. You can see the shimmer really well here.
No matter what you think of the two colors I picked out of this collection you should definitely check it out for yourselves. With so many shades to be found in this collection you're sure to find a color created just for you.
Thursday, May 24, 2012
Bonsai
Wow! I am like dead on my feet. I've been going to my sister's place every day. Sometimes we go shopping, mostly we go tanning. I'm getting a nice jump on some summer color. She also has three little girls: the older two in school and a two-year-old with her constantly. So, I've been getting run ragged by a little girl who wants to play with her 'Annie'. I was talked into throwing a softball for her and the middle girl yesterday. This is why I have a dog! Children expect you to run after them and get involved unaware that you are many years older than them and have nowhere near the amount of energy they have ... a dog will run and bring the ball back perfectly content if you stand in the same spot the entire time! Lol. I've had no time or energy to create elaborate nail art so I used a stamp and my dotting tool for this one.
I picked this color up last weekend during a shopping trip to Walmart. They have changed their entire selection of nail polish. They now offer new brands of nail polish and new collections from old brands. As always seems to be the case though, the one collection I was there looking for was the one collection they seemed not to have. With my luck, I simply overlooked it.
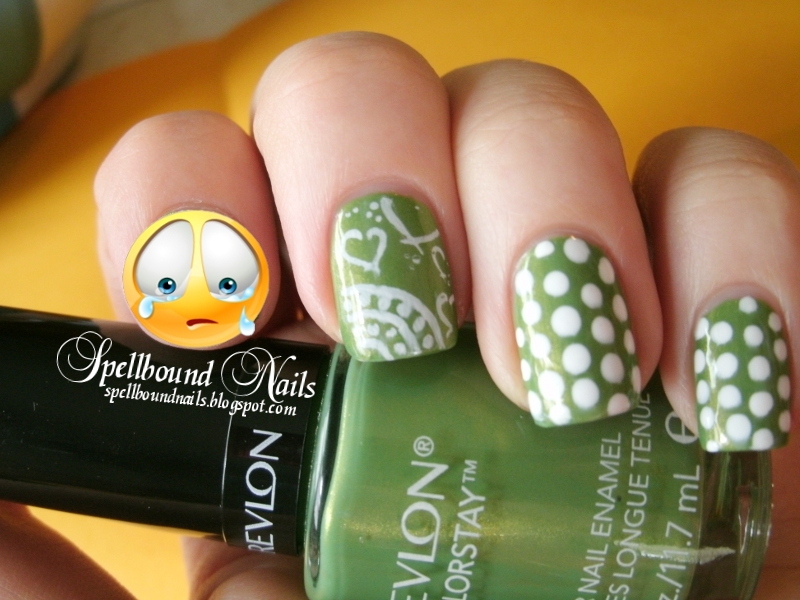
I did manage to snag Bonsai from the Revlon Colorstay collection. I'm not the kind of person who can pull off many shades of green without looking sickly, but Bonsai is a really pretty shade that worked well with my skin tone. This might have something to do with the very light yellow gold shimmer.
You can see in the pictures that the shimmer is very hard to see though. That wasn't the only problem I had with this polish either. The polish was very hard to get on the nail, streaky and with large gaps where the polish wouldn't lay. I had to use three coats to get total coverage. It wasn't such a big problem since I was using a design over it, but it is something to think about if you enjoy one color nails.
Another downside is that this polish only stayed on for one day! Not even that long because it showed signs of wear almost immediately and began chipping that night. I know I've been going non-stop and have likely put my nails through some hard times but that was ridiculous. Especially from the Colorstay collection which touts long wear, 11 days of wear if worn with their base and top coats. I did not wear this with their top coat but I did use their base coat. That should add something right?? I will allow that maybe I got a bad batch or some other kind of error because I have never had this many problems with the other polishes I own from this collection. But ...
All in all, pretty though it may be, I don't think Bonsai will become a staple around my house.
The stamping was done with Sally Hansen White On. I found this worked very well with my image plate but that might have something to do with White On being very old and thick. If you have some old lying around give it a try with your stamper. Or try it with new and let me know how it works.
I'm off to get ready for another day on the town. Have a great day everyone!
I picked this color up last weekend during a shopping trip to Walmart. They have changed their entire selection of nail polish. They now offer new brands of nail polish and new collections from old brands. As always seems to be the case though, the one collection I was there looking for was the one collection they seemed not to have. With my luck, I simply overlooked it.
I did manage to snag Bonsai from the Revlon Colorstay collection. I'm not the kind of person who can pull off many shades of green without looking sickly, but Bonsai is a really pretty shade that worked well with my skin tone. This might have something to do with the very light yellow gold shimmer.
You can see in the pictures that the shimmer is very hard to see though. That wasn't the only problem I had with this polish either. The polish was very hard to get on the nail, streaky and with large gaps where the polish wouldn't lay. I had to use three coats to get total coverage. It wasn't such a big problem since I was using a design over it, but it is something to think about if you enjoy one color nails.
Another downside is that this polish only stayed on for one day! Not even that long because it showed signs of wear almost immediately and began chipping that night. I know I've been going non-stop and have likely put my nails through some hard times but that was ridiculous. Especially from the Colorstay collection which touts long wear, 11 days of wear if worn with their base and top coats. I did not wear this with their top coat but I did use their base coat. That should add something right?? I will allow that maybe I got a bad batch or some other kind of error because I have never had this many problems with the other polishes I own from this collection. But ...
All in all, pretty though it may be, I don't think Bonsai will become a staple around my house.
The stamping was done with Sally Hansen White On. I found this worked very well with my image plate but that might have something to do with White On being very old and thick. If you have some old lying around give it a try with your stamper. Or try it with new and let me know how it works.
I'm off to get ready for another day on the town. Have a great day everyone!
Friday, April 27, 2012
Pretty Camo
Hello, girlies! I tried my hand at stamping again today. I still haven't got it down yet, but I might be getting better. What do you think?
I think of this mani as deconstructed camo or my attempt at 'pretty camo'. While doing this design, I kept in mind the camo that uses various shades of green and tan to create leaves and a wood texture. I think it turned out very nice with this flowery, girlish stamp.
For some reason the middle nail smudged horribly when I stamped the design. Can you push too hard while stamping?
The two polishes used come from the Revlon Colorstay collection which just arrived in my small town. They are Bare Bones and Spanish Moss. I picked them up with a slightly different mani in mind but they looked far too much like camo colors to do anything else with them. :)
I'm still not sure how other bloggers get such perfect and whole stamps, but I'm just happy to see more than half the stamp on my nails this time!
I think of this mani as deconstructed camo or my attempt at 'pretty camo'. While doing this design, I kept in mind the camo that uses various shades of green and tan to create leaves and a wood texture. I think it turned out very nice with this flowery, girlish stamp.
For some reason the middle nail smudged horribly when I stamped the design. Can you push too hard while stamping?
The two polishes used come from the Revlon Colorstay collection which just arrived in my small town. They are Bare Bones and Spanish Moss. I picked them up with a slightly different mani in mind but they looked far too much like camo colors to do anything else with them. :)
I'm still not sure how other bloggers get such perfect and whole stamps, but I'm just happy to see more than half the stamp on my nails this time!
Subscribe to:
Posts (Atom)